The role of 3D printing in modern jewelry creation
Picture trying to carve delicate filigree by hand or creating perfectly matched pavé settings without spending weeks on a single piece. 3D printer jewelry technology gives you the power to create intricate, detailed pieces that would be incredibly difficult to hand-carve using traditional methods. This approach offers remarkable precision, reducing human error while significantly cutting production time. Digital techniques make 3D printed jewelry production far more accessible for custom, one-of-a-kind pieces.
Whether you’re curious about getting a 3D printer for jewelry design or ready to add 3D printed jewelry to your workflow, this guide walks you through everything you need to know. We’ll cover the technology itself, the production process, key benefits, material choices, and what’s coming next in modern jewelry creation.
Understanding 3D Printing Technology for Jewelry
Several different methods make 3d printer jewelry design possible, and each one works better for certain situations. Your choice comes down to how much detail you need, how many pieces you’re making, and whether you want casting patterns or finished pieces.
What is 3D Printing
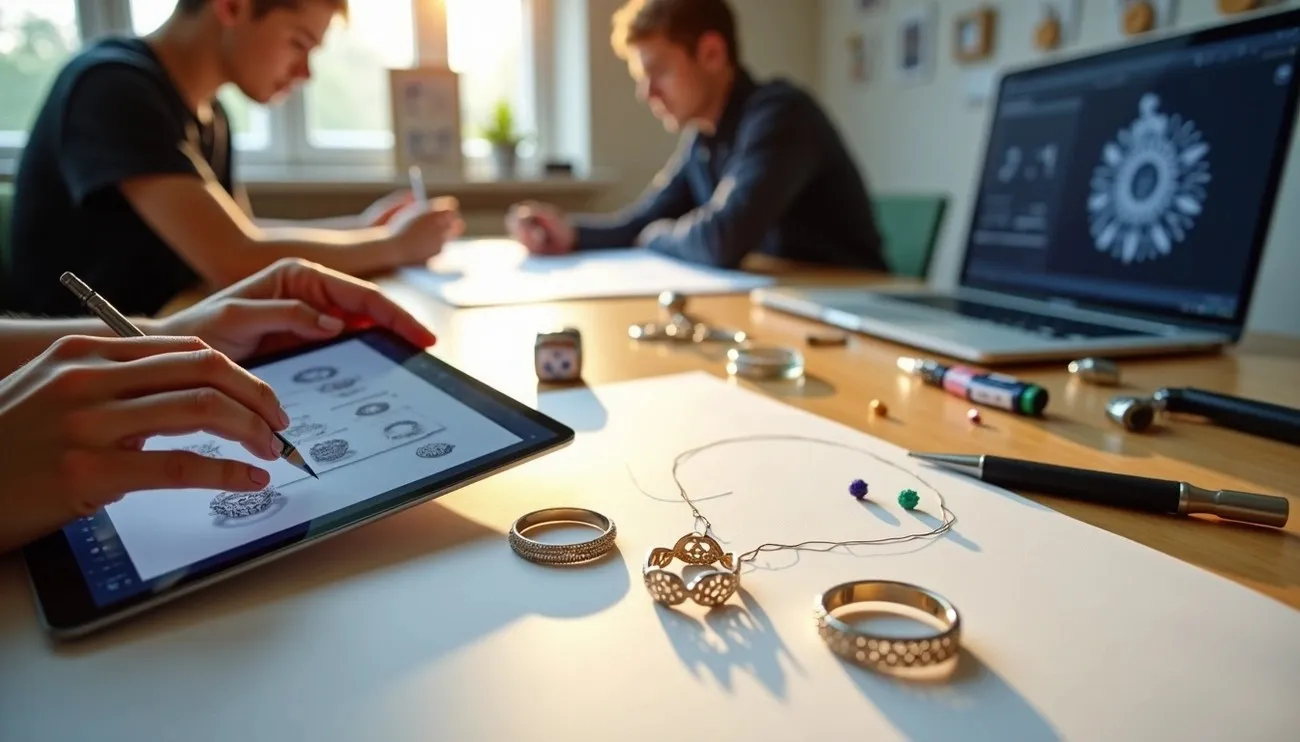
3D printing means additive manufacturing processes that build objects one layer at a time from digital files. For jewelry, you start with CAD software made specifically for our industry. Programs like RhinoJewel, RhinoGold, or MatrixGold let you design intricate pieces on your computer before sending them to a 3D printer for jewelry. The printer makes either a pattern for traditional casting or prints the actual piece directly, depending on what technology and materials you choose. This digital approach saves your designs permanently, so you can easily change them or make copies whenever you need to.
Stereolithography (SLA) for Jewelry
SLA ranks as the most popular method for 3d printed jewelry production. French and American scientists invented it in the early 1980s, and Charles Hull got the patent in 1983. This process uses UV light to harden liquid resin one layer at a time. You get exceptional precision with tolerances typically less than 0.05 mm, plus the smoothest surface finish available.
Each layer measures around 50µm thick – about as thin as a human hair – but can go as small as 10µm. This level of detail makes SLA perfect for creating highly detailed casting patterns. The accuracy means your prints match your final design exactly, so you can spot and fix problems before you start production. SLA uses a precise UV laser to solidify each resin layer, creating parts with strong, consistent properties through chemical bonding rather than just sticking layers together.
Jewelers love SLA because you can create intricate patterns and molds that would be tough to make by hand. The surface comes out so smooth that you barely need to clean it up afterward. You can also apply different finishing techniques like vapor honing, bead blasting, and even metal plating with nickel.
Selective Laser Sintering (SLS)
SLS uses a powerful laser to fuse tiny particles of plastic powder into solid shapes. Dr. Carl Deckard and Dr. Joe Beaman developed this powder bed fusion technology at the University of Texas at Austin in the mid-1980s. The loose powder around your part supports it while printing, so you don’t need separate support structures.
SLS makes parts with equal strength in all directions, unlike some other 3D printing methods that create weaker spots between layers. The technology mainly uses polyamide powder, which has excellent strength and durability, though it also works with flexible materials like TPE and TPU. SLS creates strong, functional parts perfect for prototypes and actual use, but the machines cost a lot and need skilled operators.
Fused Deposition Modeling (FDM)
FDM gets used least often for jewelry applications. This technology simply can’t handle the very complex, detailed, or tiny designs that jewelry requires. FDM works with plastics like ABS, PLA, PETG, and nylon, building objects by squeezing out melted material layer by layer.
While FDM doesn’t work well for fine jewelry, it has benefits in other areas like affordable manufacturing, quick prototyping, and working with many different materials. The technology works fine for rough prototypes and testing ideas, but it lacks the resolution you need for detailed 3d printed jewelry production.
How 3D Printed Jewelry Actually Gets Made
Creating 3d printed jewelry follows a clear workflow that brings your digital ideas into the physical world. Each step matters for getting from concept to finished piece, and understanding how digital files become wearable jewelry helps you make better decisions along the way.
Starting With Digital Design
Your journey begins with CAD software built specifically for jewelry work. Programs like RhinoGold, MatrixGold, ZBrush, or Blender let you create detailed three-dimensional models. These tools come loaded with features jewelers actually use – ring sizing, metal weight calculations, automated stone setting builders, and pavé tools.
Once your design feels right, you export it as an STL file. Think of this format as a universal language that describes your object using triangles, which 3D printers can read and understand. Slicing software takes over from there, breaking your model into hundreds of thin horizontal layers that tell the printer exactly what to build.
Creating Your First Physical Version
Here’s where things get exciting – your first real prototype. You can print multiple versions using standard resin, testing different variations and seeing how everything fits together before you commit to a final design. What used to take weeks now happens in days.
Your customers will appreciate holding something real. A 3D printed model gives them a chance to actually see and feel what they’re getting, providing feedback on size, shape, and overall style. Once everyone’s happy with the design, you print the final version in castable resin that’s ready for the investment process.
Cleaning and Preparing Your Print
Fresh prints need attention before they’re ready for casting. Washing with 99% ethyl alcohol works best – it removes uncured resin cleanly and evaporates quickly when you hit it with compressed air. You might be tempted to use isopropyl alcohol, but it can leave residue that damages the polymer and causes casting problems.
After washing, make sure all solvent is gone with compressed air. Some resins need a quick UV cure to reach their full strength. Then comes sanding to remove support marks and smooth any rough spots, though with jewelry you’re mainly focused on getting rid of visible support structures.
From Pattern to Metal
The investment casting process turns your printed pattern into actual metal jewelry. Here’s how it works:
- Coat your printed model with ceramic slurry that sticks closely to create the inner surface of the shell
- Add sand to the wet slurry, then repeat both steps until you’ve built up enough thickness
- Fire the whole thing in a furnace to burn out your resin pattern completely, leaving behind a perfect hollow space
- Pour molten metal into that space using vacuum suction or centrifugal force
- Once everything cools, break away the ceramic shell to reveal your metal piece
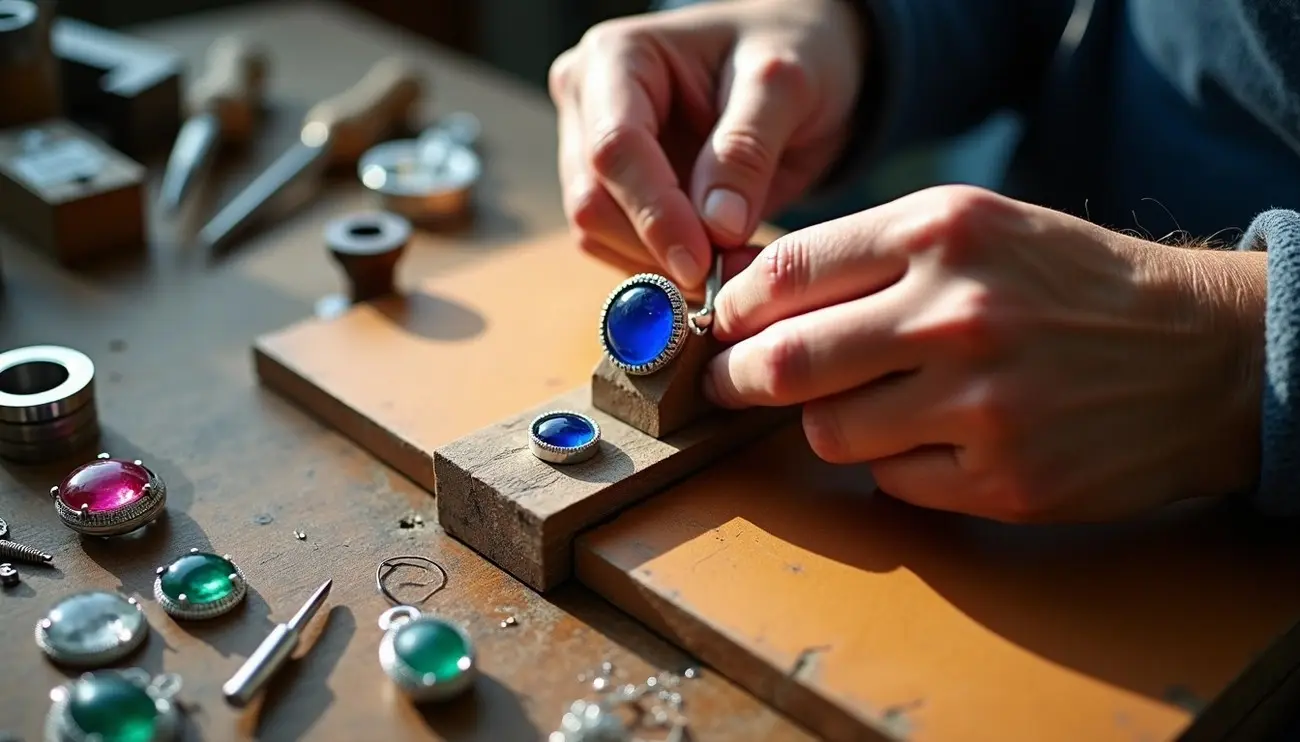
You’ll finish with sanding and polishing to get the surface just right. Sometimes you need a bit of additional machining to meet specific requirements, then it’s ready for final inspection.
Why Jewelers Choose 3D Printing
Jewelry makers turn to 3D printing for reasons that go well beyond keeping up with trends. The benefits touch every part of your business – from what you can create to how happy your customers are, plus your bottom line and environmental impact.
Creating Intricate and Detailed Designs
3D printing lets you produce shapes that would be nearly impossible to achieve by hand or with traditional tools. High-resolution printers capture details as fine as 25 microns, which means you can create delicate filigree-like structures that were previously out of reach. For stone settings, you can print micro-prongs with gaps as small as 0.2 mm, giving you the precision and smooth finish that detailed pieces need.
Think about designs with thin wires, twisted elements, ornate surfaces, or hollow lightweight structures. You can now make items that need internal supports to reduce weight, or create designs that would normally require multiple pieces, all as one complete unit. The complexity of your design doesn’t make it harder to manufacture anymore.
Meeting Customer Demand for Custom Pieces
Here’s something worth knowing: customization makes up more than 40% of the bridal market, with 15% being completely custom pieces and over a quarter having at least some personalization. When you combine on-site digital design with 3D printing speed, you can dramatically shorten the back-and-forth with your customers. You can discuss the design together, and within an hour, your customer can actually hold and try on a physical model.
Every piece can be personalized or completely bespoke – from ring sizing to pavé finishing. Making changes costs pennies instead of hundreds of dollars in precious metals. This kind of personalization helps customers feel more connected to their jewelry, making each piece more meaningful to them.
Reducing Production Time and Labor Costs
Hand-carving wax models used to take days or even weeks. With 3D printing, you can produce detailed models in just a few hours. An entire build table full of rings can print in as little as 45 minutes. One jeweler shared that they go from CAD to cast in 2-3 days for custom rings, while another mentioned receiving a ring order in the morning, printing in the afternoon, casting the next day, and shipping for delivery the following day – a complete 72-hour turnaround.
The cost savings add up quickly. One jeweler reported that 3D printing added a 30% additional profit margin because they no longer need to pay anyone else to produce their products. Even factoring in the cost of printing models on a DLP printer versus outsourcing at higher rates, you can save hundreds of dollars weekly. Another business saved an average of 30 hours per week on setup, printing, and cleanup.
Lower Barrier to Entry for Small Businesses
Entry-level desktop 3D printers have become much more affordable, making them accessible even for small-scale operations. With payback periods of twelve to eighteen months or sooner, the investment pays for itself quickly through reduced production costs. Modern printers designed for jewelry don’t require huge upfront investments. The workflows have become intuitive too – some claim anyone can learn to use the printer in 15 minutes[133].
Sustainability and Waste Reduction
3D printing uses only the material you need, layer by layer, which cuts down on waste. Traditional methods often involve cutting away excess material, but additive manufacturing produces only 40% of the waste that subtractive technologies create, and much of that waste can be recycled. This approach reduces your material consumption and fits well with more sustainable business practices.
Choosing the Right Materials for Your 3D Printed Jewelry
Material selection makes or breaks your 3D printed jewelry workflow. Your choice between castable resins and direct metal printing depends on your production method, design complexity, and the final metal you want to achieve.
Understanding Castable Wax Resins
Castable resins contain actual wax components that burn out cleanly during investment casting. Here’s what you need to know: standard 3D printing resin can’t be used for metal casting because it leaves ash behind, but specialized wax-based castable resins provide clean, 100% ash-free burnout. Modern jewelry casting resins now offer ash content below 0.01% post-burnout, zero-expansion curing profiles, and surface resolution finer than 25 microns.
Wax content varies depending on what you’re making. Formlabs’ Castable Wax Resin contains 20% wax with zero ash content, while high-performance options reach 30%, 60%, 80%, or even 82% meltable wax for solid and thick gage designs. Higher wax content means the material melts more seamlessly during burnout, behaving just like traditional jeweler’s wax. These resins capture intricate features like micro-pavé settings with excellent surface finish and support print resolutions down to 25 and 50 microns.
Direct Metal Printing Options
Direct metal 3D printing using Selective Laser Melting skips the casting step entirely. Systems like the MYSINT 100 can process precious metals including yellow gold, white gold, platinum alloys, bronze, titanium, steel, nickel alloys, and pure copper. Platinum works particularly well for SLM because traditional casting presents challenges due to its high melting temperature and high reactivity with crucible and investment mold materials.
Market-Leading Specialty Resins
Epoxy resin commanded 41.3% of the market in 2025, favored for dimensional stability and low shrinkage rates below 2%. Polyurethane resin held 29.4% of revenues with rapid cure times of 15 to 30 minutes, while polyester resin accounted for 17.8%.
Current Challenges and What’s Coming Next
Despite growing enthusiasm for 3d printer jewelry, real obstacles still slow broader adoption. The good news? Many of these barriers are shrinking as technology improves.
Surface Quality and Technical Hurdles
Here’s the reality: Metal 3D printed parts typically emerge with rough textures, partially sintered particles, and inconsistent tolerances. You’ll spend considerable time post-processing to remove surface imperfections left by supports. Direct metal printing also produces objects with lower strength compared to machined, cast, or welded parts from identical materials. The minimal size of elements for direct metal printing shouldn’t be less than 1-2 mm, whereas jewelry usually contains more intricate details. Resin residues on investment surfaces from improper burnout cause part defects during molding.
But don’t let these limitations discourage you. Direct metal printing excels at producing complex internal structures and lightweight designs impossible to cast. Think hollow forms, internal lattice structures for reduced metal weight, and multi-component designs that snap together without soldering. These are design possibilities that simply didn’t exist before.
Cost and Learning Barriers
The price tag on high-precision 3D printers capable of producing intricate jewelry pieces often reaches tens of thousands of dollars, which can be prohibitive for small businesses and independent designers. Professional DMLS or SLM systems range between $150,000 and $500,000. Currently, fewer than 12% of independent jewelers in the U.S. have adopted additive manufacturing workflows.
Yet modern systems are becoming more accessible. Workflows are intuitive and user-friendly, with some printers learnable in 15 minutes. Plus, 99% reliability ensures consistent production without costly troubleshooting. The investment often pays for itself faster than you might expect.
What’s on the Horizon
AI and machine learning enable faster design iterations. Multi-material printing is making it possible to blend rigid and flexible elements in single designs. Direct metal printing is expected to become more prevalent as precious metal powder costs decrease.
Market Movement
The prototyping segment held 43.4% market share in 2024. The functional part manufacturing segment is poised to grow at the highest rate through 2032, owing to advancements in direct metal printing and durable resin materials. This suggests the technology is moving beyond just creating patterns toward producing finished pieces.
Moving Forward with 3D Printing
3D printing has opened doors in jewelry creation that were simply closed before. You now have access to design freedom, speed, and cost savings that can genuinely change how you work. Whether you’re crafting intricate custom pieces or looking to streamline your entire production process, this technology delivers results that traditional methods just can’t match.
The best part? Getting started becomes easier every year as printers get more affordable and user-friendly. Yes, there are still bumps in the road like surface finish challenges and material quirks, but the solutions keep improving. Direct metal printing and specialty resins are getting better at addressing these concerns.
Here’s the thing – if you want to stay competitive in today’s jewelry market, 3D printing isn’t really optional anymore. The real question is when you’ll start exploring how it fits your specific creative goals and business needs. Start small, learn as you go, and see where this technology can take your work.
FAQs
Q1. How does 3D printing technology work in jewelry making?
3D printing in jewelry involves creating digital designs using specialized CAD software, then building physical objects layer by layer from these digital files. The printer produces either casting patterns or final pieces depending on the technology used. This digital workflow allows jewelers to create intricate designs with exceptional precision, modify them easily, and reproduce them whenever needed.
Q2. What are the main advantages of using 3D printing for jewelry production?
3D printing offers several key benefits including the ability to create highly intricate designs impossible to hand-carve, significantly reduced production time from weeks to just hours, lower labor costs with up to 30% additional profit margins, and minimal material waste. It also enables rapid customization, allowing jewelers to produce physical prototypes within an hour for customer approval.
Q3. Which 3D printing method is most popular for jewelry design?
Stereolithography (SLA) is the most popular method for jewelry production. It uses UV light to cure liquid resin layer by layer, achieving exceptional precision with tolerances less than 0.05 mm and the smoothest surface finish of any 3D printing process. SLA is particularly valuable for creating detailed casting patterns with layer thickness as thin as 10 microns.
Q4. What materials are used for 3D printed jewelry?
Specialized castable wax resins are most commonly used, containing 20% to 82% wax content that burns out cleanly during casting with zero ash residue. For direct metal printing, precious metals like yellow gold, white gold, platinum, bronze, titanium, and copper can be processed. The choice depends on whether you’re creating casting patterns or printing final metal pieces directly.
Q5. What are the current limitations of 3D printing in jewelry?
The main challenges include rough surface textures on direct metal prints requiring time-consuming post-processing, high equipment costs ranging from $150,000 to $500,000 for professional systems, and minimum element sizes of 1-2 mm for direct metal printing which may not suit extremely intricate designs. However, these barriers are decreasing as technology advances and more affordable, user-friendly printers become available.